
Instruction guide
Follow the steps exactly for a successful reline.
Please review all instructions carefully before you start. The contents of each kit are intended for one denture plate.
Table of contents
- Kit contents & supplies
- Find your suction spot
- Upper denture reline
- Snug-Up layers
- Lower denture reline
- Trimming & care
Caution: Do not use immediately following extractions — consult your dentist first. DentureFit is for acrylic dentures only; it is not for alternative denture materials.
Have a partial, or applying over a soft professional reline? Look for the variation notes in the steps below, or call us at (844) 682-3368.
Before you begin
Kit contents & supplies needed
Understanding how to handle each piece of your kit is critical to avoid wasting product.
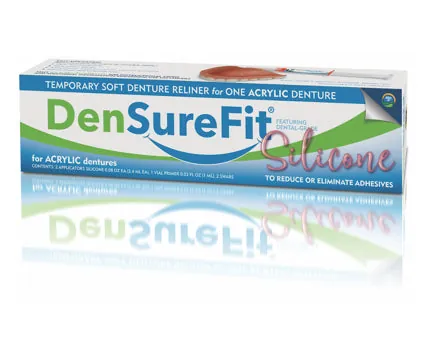
Inside the kit
- Primer — one thin, even coat makes the silicone stick to your denture.
- Primer swabs — use each swab once. Dip ONE time and remove immediately.
- Silicone applicators — use one applicator per application. After 4 minutes of curing, assess your fit; if you’re not snug, add another over the first layer.
Have on hand
- A clean, dry towel
- Dish soap
- Rubbing alcohol & cotton balls/pads
- Scissors
- A timer or stopwatch
Primer tip: the swab is highly absorbent — leave it in and it will soak up all your primer. Recap tightly and store upright in a cool place.
The most important concept
How to locate your suction spot
DentureFit works by suction on the upper denture, and that suction happens in the suction spot on the roof of your mouth. Your roof barely changes, so it is always your reference point. When the denture is seated correctly during your reline, the silicone fills the voids in exactly the right places.
Practice first: with your denture out, wrap your finger around your nose and give your thumb a few sucks. Feel where the pad of your thumb is drawn into the curved roof of your mouth — that’s your suction spot. Push straight up; not back toward your throat, not forward toward your front teeth. Then practice the same with your denture in.
You have one shot to get your foundation layer right. If it isn’t right, you’ll need to peel it out and start over.
Upper denture
Upper denture reline, step by step
Clean, rinse & dry
Wash with dish soap, towel dry, and air dry thoroughly. Denture cleanser alone isn’t enough — adhesive residue must go. Pro tip: wipe inside with rubbing alcohol until squeaky clean.
Apply primer
One quick dip. Paint a thin, even coat over the entire interior — on and ¼″ over the ridges, the walls, palate, trough and back edge. Let it dry for two minutes.
Activate & apply silicone
Don’t activate the applicator until you’re ready. Apply three lines to the palate and the rest in the trough — quickly, so it spreads while fluid.
Seat & hold 4 minutes
Insert immediately and suck your thumb to seat the denture in your suction spot. Hold firmly for four minutes — don’t remove it.
For partials
Gently snap the partial in — don’t press or bite down. Check in the mirror that it’s even, touch your teeth together in a natural bite until they make even contact, then stop and relax for four minutes.
Assess your fit
Check the palate impression is thin and even (humps mean start fresh — call us). If silicone didn’t reach up and over the ridge (“flashing”), your voids aren’t filled yet — continue with a Snug-Up. If you’re snug, let it finish curing in water or cleaner for two hours before wearing.
Snug-Up application
Not snug yet? You’re normal.
Most wearers with medium looseness need two silicone applications for complete snugness; significantly loose dentures likely need a third.
DentureFit silicone is build-able — it adheres to itself without primer. As your denture loosens over time, add silicone to your previous layer in the trough area only. Never add another layer to the palate.
Make sure the previous layer is perfectly clean and dry first, and prime any bare acrylic around the edges.

Lower denture
Lower denture reline
Yes — DentureFit can be used on a lower denture. If you wear both, line your upper first: you need a great-fitting upper (with no adhesive) to properly seat your lower. On the lower denture, 1–2 silicone applicators are normal.
Some people with lower plates may still want the extra security of a powder adhesive on top of the liner — powder adheres best to silicone.
Trimming & care
Keep your liner comfortable and clean
Trim carefully
Only trim if silicone is loose, hanging, uncomfortable, or visible when you smile. Trim on the front above the teeth — never on top of the ridge, or you’ll break the seal. Leave a little flashing at the back of the palate.
Clean daily
Remove your denture every day, soak it in a regular denture cleanser, and gently brush the liner with a soft-bristled brush. Use harsh stain-removing cleansers only once a week.
Replace about every 3 months
When it’s time, lift an edge and slowly peel the silicone away. A dull tool like a wooden cuticle pusher can help. Replace sooner if it discolors, deteriorates or lifts.